Today I'm going to share with you my favorite Christmas tradition.
With all the cleaning, shopping, wrapping, baking, etc. that goes on in the weeks before Christmas; and then all the travelling a few hours here and a few hours there to see all the family, like most people I end up exhausted by Christmas day. Then Christmas day itself is about crazier than any other day for us!
To recoup from the hectic pace we take the day after Christmas to do absolutely nothing! We stay in our pjs, clean up nothing, watch new movies, order take out and relax. We look forward to this day through the whole season. When things are crazy and one of us is about to snap we remind each other "the day after Christmas."
Whether before, day of, or after Christmas dedicate some time to just relax. I guarentee it's worth it!
Friday, December 19, 2008
Tuesday, December 16, 2008
My Bill Folder
In order to keep myself from going insane and to make sure all my bills get paid I've developed a folder that has worked wonders in our home.

The folder is actually a three ring binder; it contains "extra" paper, envelopes, pocket inserts, bill lists, stamps and a note book.

I type a list of all bills to be paid in a month and as they are paid I write in the amount and date paid. This gives a great overview at a quick glance, helps with sticking to a budget (because you can easily see what is left to be paid) and gives peace of mind that everything has been covered. When a sheet is full I move it to the back of the "bill papers" so I can go back and see how things have gone up, etc.

There is a pocket insert for each bill, as soon as a bill is paid I stick the bill in it(if paid online, if not then the rest of the page after tearing off the bill). When they get filled, after about 3/4 of a year to a year typically, I file them in a cabinet. At this point I shred any bills in the file that are over a year old.
In the note book is our financial vision, goals (short term and long term), what we are saving for and the monthly amounts (ie. Christmas, trips, etc), what we are supposed to be paying extra on each month, home improvements with the dates, and car care with the dates. We look at the note book each time we pay bills to keep us focused and on track.
Tuesday, December 9, 2008
Strawberry Pretzel Salad
This is a dish that has been served with Thanksgiving and Christmas dinners in our family for as long as I can remember. It could also be served as a dessert!
1st Layer:
2 cup crushed pretzels
3 TBS sugar
3/4 cup melted margarine
Mix and press into bottom of 13x9" pan. Bake 10 min. at 400 degrees. Let cool.
2nd Layer:
8 oz. cream cheese
1 sm cool whip
1 cup sugar
Blend together and spread over cooled crust.
3rd Layer:
1 lg strawberry Jell-O
2 cup boiling water
2 bags 10 oz frozen Strawberries
1 sm can crushed pineapple
Dissolve Jell-O in boiling water. Add strawberries and pineapple. Chill until almost solid. Spoon over cream cheese mixture. Chill for 2 hours before serving.
Thursday, December 4, 2008
Keeping Track of Christmas Spending
The easiest way I've found to keep track of my Christmas spending and to stay within budget is super simple. I lable an envelope "Christmas Reciepts" and keep it on hand in the kitchen (where I unload everything). As I'm out shopping I make sure to pay for all Christmas things seperate from anything else. When the cashier hands me the receipt I immedietly stick it in a bag. As I unload at home I put aside the receipts then stick them in the envelope. Not only does it make going over your budget easier but it keeps receits handy for returns!
When the Holidays are over I go through all the receipts and figure out how much I spent in different categories, such as: baking supplies, gifts for each family member, gifts for people outside the family, wrapping, decorations, cards, stamps, etc. It's then easy to budget and figure out where you can cut back or add to for the next year.
Tip: if you are paying cash, then as you put your receipt in the bag put your change in with it. Save it until after Christmas and then spend it on sale stuff or a relaxing night out with your hubby!
Wednesday, December 3, 2008
Wreath tip
Christmas time is here!!! Now we get to dress up our homes with all the Christmas fun stuff. I recently came across this idea for hanging wreaths....
If you have several wreaths here is a great idea for hanging one on each side of the door! Decide how far down you want them to hang (it needs to be even). Measure one side and cut ribbon a few inches longer than double what it measured. Attach a wreath to each end of the ribbon. Hang it over the door, they will balance each other. For added security place a piece of masking tape across the ribbon on the top of the door.
If you have several wreaths here is a great idea for hanging one on each side of the door! Decide how far down you want them to hang (it needs to be even). Measure one side and cut ribbon a few inches longer than double what it measured. Attach a wreath to each end of the ribbon. Hang it over the door, they will balance each other. For added security place a piece of masking tape across the ribbon on the top of the door.
Monday, December 1, 2008
Frozen Peppermint Chocolate Pie
An easy seasonal pie that keeps in the freezer for weeks! It's always a hit.
Frozen Peppermint Chocolate Pie
2 Oreo cookie pie crust
1 gallon peppermint ice cream(Eddy's is great), slightly softened
1 whipped topping, thawed
1 jar hot fudge ice cream topping, warmed
Crushed peppermint candy
Spread ice cream over crust, about 3/4 full; top with whipped topping. Cover and freeze until solid. May be frozen for up to 2 months. Just before serving, drizzle with hot fudge topping and sprinkle with peppermint candy.
Sunday, November 23, 2008
Look Good in Your Holiday Photos
If you are getting professional Christmas pictures or just want to look good in your regular holiday photos, here are a few suggestions to help.
Hair:
Don't cut your hair or change the style. Keep it natural.
Face and body:
1. Makeup needs to be a little heavier than normal. Avoid anything with sparkles, it could create a white spot that could look like a blemish. Foundation with SPF makes skin look shiney. Mascara should be clump free.
2. Tan lines look very bad in photos and sunburns look worse. Avoid excessive sun or tanning for a week or so before hand. Try to cover any tan lines with your clothing.
3. If you have tattoos you don't want shown, let the photographer know and they can help you hide them.
4. If you have braces don't try to hide them by holding back smiles; in the end it only looks worse. Let yourself smile normally.
5. Don't pull your head back. If you gently pull your chin out and slightly down it is much more flattering.
Clothes:
1. Don't wear stripes or plaid; solids photograph better.
2. Wear clothing that flatters you. If you don't like your arms then don't wear sleeveless tops, etc.
3. If you're wearing light bottoms make sure you are also wearing plain, light underwear. Same with shirts and bras.
4. No bra straps showing please! They are unattractive in real life and worse in pictures. Also make sure the bra doesn't create unsightly lines in your top.
5. Light clothes look better on light backgrounds and dark clothes look better with dark backgrounds.
6. Jewelry should be kept simple, so that you are the focal point and not your necklace.
7. Nail polish: Your toes and nails will show up, so make sure you remember to do them. Avoid bright or dark colors, natural photographs better.
For guys:
1. A clean shave photographs best.
2. If he's wearing a dark outer shirt he needs to wear a grey or dark undershirt. Otherwise the white will stand out.
For Professional Photographs:
Bring your own props and as many as you want. Anything from toys or musical instruments to sports equipment. Whatever can help define you. This is typically done for children, teens or whole families.
For at Home Photography:
Don't be afraid to pose you and your spouse in front of a mirror. Try several ways of standing or sitting to see what best flatters or that feels most natural. This way when there is someone around to take your picture you can pose instead of having that same old sitting or standing side by side look.
Wednesday, November 19, 2008
Quick clean up
It's about that time...when family and friends all come around and instead of enjoying it we get stressed. If you've deep cleaned your house recently you're in good shape (if not, then I suggest you do a really good cleaning soon, at least a week before company is due). All that you have to do now is clear clutter and quick clean and then you'll be ready for guest. I'll give you tips on the quickest clean (around 15 minutes total) for the biggest bang and then a few more for if you have extra time or help.
Whichever area they see first is where you need to start. This is why I usually get my husband to mow and edge a week or so before a holiday or event(since we live in sunny FL!). I suggest you keep an extra storage tote handy in your garage or a closet that you can use to throw clutter in at the last minute to be dealt with later. It's preferable to keep clutter at a minimum on a daily basis though.
Livingroom: the main thing here is to get rid of clutter and straighten.
Extra time or helpers: sweep or run the vacuum and do a quick dust on the tables or in prominent areas.
Bathroom: put cleaner in the toilet and let it sit while you wipe down the faucets and mirror with paper towels and Windex, then flush the toilet (when the faucets are clean everything else looks better, if everything else is clean and not the faucets the bathroom will still look messy). Clean up any major spots or spills in the sink or on counter. Close the shower curtain.
Extra time or helpers: Scrub the toilet instead of just flushing. Empty the trash. Wipe down the sink, counters, floor and toilet with Windex.
Kitchen: Sweep. Clear clutter. Get all dishes out of sight - put dirty ones in the dish washer (or oven if you won't be cooking!), and clean ones put away. Wipe down sink and faucet and table.
Extra time or helpers: Wipe down all counters, refrigerator, stove and garbage can. Take out trash if it's full.
Bedrooms: Make the bed. Clear clutter.
If working quickly, you should be able to pull off the quickest clean within 15 minutes. If you add in the rest and you're working on your own then it will take about 30 to 40 minutes.
Tip: if you want to make things as easy as possible do a deep clean and then set aside 15 minutes every night. Before going to bed pick up clutter and either put it away or in the room it needs to be in. Straighten the family area and kitchen. Wash and put away any dishes that are remaining. If you have kids get them into the same routine (they can start putting away things as soon as they can pull them out). Before they go to bed every night have them go around and put away all their toys. If you do this every night you will be much less stressed every morning.
Monday, November 17, 2008
Ready for travel?
Getting ready to go away can be very stressful and something is always forgotten. So here's what I've done and hopefully it will help to make sure at least part of your packing goes well.
It only takes me 5 minutes to get my toiletries ready for a trip! Here's how you do it...
First buy 2 toiletry bags that come with refillable bottles (one for you and one for your husband, more if you have kids). You can usually find these anywhere from $7-$15. You could also dedicate a small bag you have around the house and buy the bottles seperate.
Fill the bottles with your own shampoo, conditioner, body wash and face wash. This saves money and you get to have your favorite products. You can use a Sharpie to mark the bottles so they don't get confused.
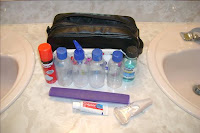
I stores those in the bag along with my tooth brush holder, razor holder, tooth paste, mouth wash, small beg with cotton balls and q-tips, etc.
The key is to store all this in the bag so that when you go to pack everything is right there and ready. I suggest you keep them in a bathroom cabinet or with your suitcase, if it's in a cool place. If you refill the bottles when you return, before you pack it back up, then they are ready to go the next time.
Tip: for extra convienience I buy small bath puffs (2 or $1 type)to take along and I throw them away when we leave. This prevents packing up wet stuff and I hate using wash cloths.
Here's one of my bags.
It only takes me 5 minutes to get my toiletries ready for a trip! Here's how you do it...
First buy 2 toiletry bags that come with refillable bottles (one for you and one for your husband, more if you have kids). You can usually find these anywhere from $7-$15. You could also dedicate a small bag you have around the house and buy the bottles seperate.
Fill the bottles with your own shampoo, conditioner, body wash and face wash. This saves money and you get to have your favorite products. You can use a Sharpie to mark the bottles so they don't get confused.
I stores those in the bag along with my tooth brush holder, razor holder, tooth paste, mouth wash, small beg with cotton balls and q-tips, etc.
The key is to store all this in the bag so that when you go to pack everything is right there and ready. I suggest you keep them in a bathroom cabinet or with your suitcase, if it's in a cool place. If you refill the bottles when you return, before you pack it back up, then they are ready to go the next time.
Tip: for extra convienience I buy small bath puffs (2 or $1 type)to take along and I throw them away when we leave. This prevents packing up wet stuff and I hate using wash cloths.
Here's one of my bags.

Thursday, November 13, 2008
Bathroom Cabinet Follow-up

If you'd rather spend some money for a nifty little item, rather than going through the trouble of a shelf, I found a hair care storage system you can purchase online. I have scoured the stores and can't find them anywhere but they do have them on Amazon.com and a few other sites. I'm not sure what to call them exactly because different sites call them differnt things. You can find one by googling "hair dryer holder". They range from about $7 to $15 plus shipping and handling. I really wanted one but I had shelf stuff on hand and my cabinets aren't really conducive to screwing things into the front panel.
Wednesday, November 12, 2008
Bathroom Cabinet Space
Space is a precious thing and bathrooms never seem to have enough of it! It's always wonderful when more can be made. For a few dollars you can almost double the usable space in your bathroom cabinet.
All you need is some scrap lumber and shelf brackets. You can get scrap lumber at your hardware store or a local construction site (YES! Just be sure to ask, they are usually very nice about giving away what they aren't using); make sure it is more than a foot wide. Brackets can be found for as little as .35 cents a piece at WalMart. You'll also need a few self-drilling screws, drill and saw.
First, clear out all the clutter from under the sink. Usually the pipes run to one side or the other, choose the roomiest side for the shelf. In deciding where you will put it factor in the highest item you will store on and under the shelf, so you don't place it too low or too high. Measure the length you need the shelf to be 2 or 3 times.
Next you need to cut the wood (I had my husband do this for me the weekend before). Screw the brackets into the back of the cabinet, then screw the shelf onto the brackets. Easy and inexpensive!
Now go through all the junk you pulled out and get rid of the stuff you don't use. Root through the house for containers to organize what's left. Below are a few pictures with suggestions.
Before

After

I needed space for my hair dryer and straightening iron because they were a tangled mess behind the toilet paper. I took out several of the towels that aren't used and moved them to a linen closet upstairs.
After: I forgot the "Before"!

This was originally my biggest jumbled mess! On the shelf I organized hair goo, sunscreen, lotion, and hair etc in little baskets I found in the garage. The tackle box holds my make up, behind that are Q-tips, cotton balls and femine products. There are two baskets on the left, the front one holds things I use regularly and the one in the back holds extras and stuff I rarely use.
Before

After

This is the guest bath. Again I removed about 1/2 the towels. The cleaning stuff I stuck on the shelf and put shampoos, etc in the basket with kiddo stuff behind it.
Monday, November 10, 2008
Recipe Tip
When making a recipe you need to double or cut in half, go through the ingredients and make the appropriate adjustments and write them down. This prevents adding too much or too little of some of the ingredients!
Beautiful Chocolate Chip Cookies
These are delicious cookies that turn out beautiful every time!
1 cup Crisco, butter flavored
1/4 cup sugar
1 cup brown sugar
1 tsp. baking soda
1 sm. pkg. pudding, french vanilla or white chocolate are favorites
1 tsp. vanilla
2 eggs
2 1/2 cups all-purpose flour
1 pkg. chocolate chips(Hershey brand is best)
1. In large bowl, cream crisco and sugars; beat in eggs; mix in rest of ingredients.
2. Bake at 350 degrees for 7 to 8 minutes. Cool on bake rack.
Tip: these look under done when you need to remove them from the oven.
Friday, November 7, 2008
The Forgotten 2
There are a few more things that can be done to make your home a little more sharp and a little less shabby. Details are the key.
Touch up paint on the walls or furniture. Replace light or power plates if they have paint on them, are yellowed, or won't come clean. It's best not to paint them because they get grimy to easy and grim doesn't come off paint very well.
This is a bit more involved but first impressions are important. I recently spiffed up the front door and around it, it took about 5 hours total. First the door knob needs to be replaced, it's old and scuffed. I don't have the money to do that right now so I bought some bronze spray paint and now it looks great (this only a temporary fix and I don't recomend you plan on it lasting more than a month ot two). For the light near the door I did the same thing. I then put a fresh coat of paint on the door and the trim. Check out the pictures below!


Monday, November 3, 2008
Double Yummy Pumpkin Pie
4oz cream cheese, softened
1 TBS milk
1 TBS sugar
1 cup milk
1 can (15oz) pumpkin
2 pkg vanilla pudding
1 tsp cinnamon
1/2 tsp ginger
1/4 tsp cloves
1 tub (8oz) cool whip
1 graham crust
1. Mix first 3 ingredients in large bowl with wire whisk until well blended. Gently stir in 1/2 cool whip. Spread into crust.
2. Mix next 6 ingredients in a large bowl. Beat with wire whisk until well blended (will be thick). Spread over cream cheese layer.
3. Refrigerate 4 hours or until set. Top with remaining cool whip. Serves 10.
Great alternative to the regular old stuff. Keeps well in refrigerator for a few days.
Saturday, November 1, 2008
Extra Storage
Need a little extra storage in the bathroom? If you have too little counter or cabinet space this idea is great for things you like to have on hand.
You need a hook, length of chain and a basket (an egg basket works best). Simply install the hook into your ceiling; attach the chain as long as you'd like; hook the basket onto the end. It's great for holding brushes and other light items. If you want to put your hair dryer or other heavier things in it, make sure you buy a hook that has an anchor.
Good Luck!
Wednesday, October 29, 2008
The Forgotten
Many times the little things we forget about make a big overall difference. The small scuffs, dings, and marks on one thing are no big deal but usually they're on lots of things and can give a shabby appearance. So as part of my cleaning before the holidays I try to spiff all that up. Today I'm concentrating on trim and doors.
All you need is paper towels, windex or a bowl of water, magic eraser, and maybe some touch up paint (white out can work too!). Start in whichever room you want, my suggestion is to do the hardest room first. Wipe down the trim with a paper towel and cleaner, use the magic eraser to get off most scuffs and marks. Do the same around the doors and on the doors. Use the paint or white out to get anything the magic eraser won't take off. If the doors are really dirty, scrub it then paint it, same with the trim.
Make sure you do all the rooms including the bathrooms. This gives a nice sharp appearance to the rooms.
Monday, October 27, 2008
Soft Pumpkin Cookies
These are wonderful cookies - I couldn't mess tham up if I tried! One of the nice things about them is I usually have all the ingredients, except pumpkin, on hand.
Cookie:
2 1/2 c. all-purpose flour
1 tsp. baking soda
1 tsp. baking powder
1 tsp. cinnamon
1/2 tsp. nutmeg
1/2 tsp. salt
1 1/2 c. sugar
1/2 c. shortening (butter flavored)
1 c. 100% pure pumpkin
1 large egg
1 tsp. vanilla extract
Glaze:
2 c. powdered sugar
3 Tblsp. melted butter
1 tsp. vanilla
1. Preheat oven to 350 degrees. Grease baking sheet.
2. Combine first six ingredients in a medium bowl. Beat sugar and butter in large bowl until well blended. Beat in pumpkin, egg and vanilla, until smooth. Gradually add flour mixture. Drop by rounded tablespoon onto prepared baking sheets.
3. Bake for 15 minutes - until edges are firm. Cool on baking rack completely.
4. Combine glaze ingredients in small bowl until well blended. Drizzle glaze over cookies. They usually need about 2 hours to fully dry.
Friday, October 24, 2008
Spiff up those vents
It seems all the small odd things pop out at me when people are over, things I never noticed before. So as part of my deep clean before the holidays I like to go through the house looking at each room as if company were with me and making note of everything. Air conditioning vents (in the ceiling and in the wall) are one of those things.
If you want to go beyond just dusting them there are a few options. Option one is to buy new ones at your local hardware store. This option tends to add up pretty fast though. The second option will only cost you about five dollars. All you need is sand paper and spray paint! There are spray paints made for appliances, these work best especially in the bathroom where they will get damp. If you can't find that or prefer a color that will blend with your wall, put two coats of the regular spray paint and then one of a clear laquer (also spray paint).
Take down all the vents that are discolored or rusty, sand them with fine sandpaper (really well if they are rusty) then clean and dry them well. Next spray them with. Two coats are usually sufficient for the desired outcome. I also like to paint the screw tips (poke them in the flap of a cardboard box to spray them) for a finished look. Let them dry 20 to 30 minutes then put them back up. It takes very little money and effort but makes a big difference.
Tip: For a smooth look with spray paint, use quick, long sprays no closer than one foot away. To keep away runs and globs don't worry about immediate coverage, it's better to put on several coats, dried in between, to get full coverage than trying to get it right away. Below are before and after from my bathroom vent.


Wednesday, October 22, 2008
Bed Room Deep Cleam
Though the bedroom isn't a room needing cleaning for company coming, it will bring more things for a yard sale and leave you feeling more relaxed.
First off declutter. Nothing belongs in your room but personal items, get rid of anything else or find a new home for it; this includes whatever is under the bed. When that is finished clean the fan, curtains and all high objects. Dust everything-high and low, remembering the window sills and around the vent. Flip your mattress and vacuum.
Now comes the hard part. Take everything out of your closet and dressers. While it is empty decide whether you need to rearrange or add to your closet shelves and racks; if so-do it!
One by one go through the items and put them in three categories 1. keep, 2. maybe, 3. get rid of. This should be a quick process(that's why you have the maybe pile). The keep clothes go back in the closet or drawer and should only be what you wear and love. This is a a great time to really organize; hang types (long sleeve, short sleeve, dresses, etc) together and sort in groups by color, this makes finding what you want really easy. Now the really hard part! Go through the maybes and try to get rid of most of them. A good trick I've used, to see what I actually am wearing, is to put the hangers on "backwards" when putting everything back in. A year from now anything you haven't worn will be easily identifiable.
You should now have a clean room, more money from your yard sale and more space for new clothes!
Tip: While your closet is empty paint it a fun color that you like but aren't brave enough to use elsewhere.
Monday, October 20, 2008
Pumpkin Trifle
I just love holiday baking, once October rolls around I start on my "fall" recipies. This is a very simple dessert that looks and tastes very impressive! Many times people decline saying they don't like pumpkin desserts but after I talk them into trying it they find they do in fact like it and usually ask me to make it again (probably because there really isn't much pumpkin in it).
3 c. baked unfrosted spice cake, crumbled and divided
2 pkg. (3 ½ oz.) instant vanilla pudding mix
16 oz. can pumpkin
1 lg. Cool Whip
2 ½ t. pumpkin pie spice
3 c. cold milk
Set aside ½ c. cake crumbs for topping. Sprinkle 1/2 of the cake crumbs into the bottom of a large glass bowl or triffle dish. In a large bowl, combine pumpkin, spice, milk, and pudding powder until smooth. Spoon half of the mixture on top of cake crumbs and then half of the whipped cream. Repeat: cake, pudding, whipped topping. Sprinkle the reserved crumbs on top. Cover and chill for 2 hours.
Tip: I often make the cake a day ot two ahead and crumble it into large zip bags and refrigerate them; then I put it all together the day I need it. If you make the whole thing in advance it tends to get mushy.
Sunday, October 19, 2008
Handy Bags
I love finding ways to reuse boxes and containers. I also love corraling loose items. Here are some handy tips for keeping all those plastic grocery bags on hand and confined.
The soda boxes made to keep in the fridge are wonderful for keeping plenty of bags on hand in the kitchen. It fits easily under the sink, in the pantry or a cabinet. I also keep one of these near the litter box for easy clean out.
Empty tissue boxes keep a smaller amount of bags available. These fit well under the seat in your car, in a baby's room (for diapers) and in a bathroom cabinet-they are great trash can liners!
Wednesday, October 15, 2008
Living/Family Room Deep Clean
The living/family room is usually more about decluttering than cleaning so make sure you have the yard sale box handy again! Declutter first so cleaning is easier and remember to put things that go in other rooms just outside the door and deal with it after your done. Go through toys, dvds, coffee table books, magazines, and any other clutter that may be hanging around and get rid of whatever isn't loved or often used.
Once again start at the top and work your way down. Get any cobwebs with a vacuum or broom, then dust the fan, light fixtures and other high items you may need a ladder for. Continue dusting everything else in the room, top to bottom, not forgetting the electronics, frames, window sills and behind things. To remove dust from curtains, without removing or washing them, use a lint roller-it works wonders! Be sure to clean out any light fixtures that may have dust or dead bugs in them.
Now for the floors. If you have hard floors, sweep and mop everywhere. If you have carpets vacuum everywhere; move the furniture if you can and get under everything (you never know what may get moved when guests are over and it can be so embarassing when furniture is moved and it's filthy underneath). Vacuum in the couch and chairs as well. It's usually a good idea to clean your carpets at this point; you can borrow, rent, buy one, or pay a company to do it.
With regular clutter control it will be easy from this point to spot clean and keep it looking good through the holidays.
Tip: The living/family room an easy room to collect clutter in. Here are a few ways I have found to disguise some of it in my home.
1. Ottoman with storage room inside holds video games.
2. Old tin keeps blocks and other toys on hand.
3. Short long basket holds magazines and books and can slide right under the couch.
4. Hope chest serves for seating, holds toys and throw blankets.
5. Power strip runs from the plug in to behind the television so there is only one cord visible, the rest plug into it.
Monday, October 13, 2008
Swedish Meatballs
1 1/2 –2 lbs ground beef
1 small onion, grated
1 tsp salt
1/2 tsp pepper
1 large can mushroom soup
1 tsp sage
1 egg
1/4 cup milk
1/4 cup bread crumbs or oatmeal
Preheat oven 350 degrees. Combine all ingredients well, add ground beef last. Roll into meatballs and cook on broiler pan for 30 minutes. Add to warmed mushroom soup and serve on a bed of rice or mashed potatoes.
Serves 6 generously
This is my husbands favorite meal! There is always plenty leftover.
Saturday, October 11, 2008
Paper Corral
Like everyone else I had a "junk drawer" that I could never find anything in. I also had miscellaneous papers, reciepts, catalogs, etc. that had no home. To help solve a bit of these problems I got out three folders and labeled them "keep", "temporary keep" and "menus".
In the "keep" folder I put a printed list of addresses, buisness cards, a list of traditional and contemporary anniversary gifts, lists of things I want to do to the house, and other random papers that I want on hand but have no particular place to keep them.
The "temporary keep" folder holds reciepts, catalogs, paint swatches, anything that I want on hand but not for long!
Obviously menus go in the "menu" folder! It's so much better than when I had them stuck all over the fridge. Writing the phone numbers for frequently used restaurants on the front of the folders saves a lot of time.
It's a good idea to go through the "temporary keep" folder every month and throw out anything you no longer need. If the folders are different colors it makes quick identification easier. I keep my folders in my junk drawer in the kitchen because it is long and flat and so nothing gets put on top of them. If you don't have a drawer like that it may be easier to "stand" them in a cabinet. Just make sure it's an easy reach spot.
Wednesday, October 8, 2008
Bathroom Deep Clean
Bathrooms tend to be the next hardest thing to clean. Tackle them all at once or do one a day to make it easier.
Start the same way as in the kichen...dust the ceiling (near the vent), tops of light fixtures, pictures, tops of cabinets, etc. Next empty your medicine cabinet and get rid of outdated or unused items (your pharmacist can dispose of old medicines for you), then clean inside with all-purpose cleaner and paper towels. Do the same under the sink cabinets (leftover hair products you no longer use are often welcomed by teenagers or college students and old or worn towels should go in the rag bin).
Now you're ready for the real cleaning! Turn your shower on as hot as possible and put toilet cleaner in the toilet. As you wait for those to work clean the mirror-all of it, counter, sinks (remember under the faucets) and cabinet fronts; don't forget the soap, tooth brush and cotton ball holders! By now the steam from the shower should have loosed the grime, scrub tub, wall, etc. as usual. Clean the toilet...all of it! Now the floors. I find it easiest to use cleaner and paper towels. Be sure you clean the shower curtains. Plastic ones wash well in the washing machine. Use 1/2 cup detergent and 1/2 cup baking soda (throw in a few towels as well). Add a cup of vinegar to the rinse cycle, then hang back up to dry.
To keep the shower looking great buy a squeegie and run it over the tile/walls and door each time you shower, this cuts time between cleaning immensely.
Tip: When you're cleaning try your best not to leave the room, if there is trash or clutter that goes in another room just set it outside the door to be dealt with when you're done. This way you can't be easily distracted. I also try to keep my phone with me so I can keep working if I get a call.
Monday, October 6, 2008
Creamy Baked Chicken
This is a wonderful and easy dish. The "gravy" it makes goes really well over mashed potatoes or rice.
1 fryer chicken, cut up
1 can (10 3/4oz. ) condensed cream of mushroom soup, undiluted
1 can (10 3/4oz. ) condensed cream of chicken soup, undiluted
1 c. (8oz) sour cream
½ c. water
1 t. snipped chives
Salt and Pepper to taste
½ t. paprika
Place chicken in a greased 13x9x2 baking dish. In a bowl, combine the soups, sour cream, water, chives, salt and pepper; spoon over chicken. Sprinkle with paprika. Bake, uncovered, at 350 degrees for 1 hour or until juices run clear. Yield: 6 servings.
Tip: You can substitue boned for boneless chicken just adjust the bake time.
Saturday, October 4, 2008
Handy Hint

Just an egg slicer you say? No way! It can do more. I love using my egg slicer to slice strawberries. Simply cut off the tops and slice! Mine is the double like the picture so I have the option of which way I want them sliced. This saves so much time when I'm making Strawberry Shortcake.
Not only is it good for eggs and strawberries but mushrooms too! However, I don't recomend doing all three at once :)
Thursday, October 2, 2008
Fall Cleaning
Fall is here and the Holidays are coming! If you're like me when those holidays roll around I never seem to have much time, which makes cleaning when people are coming over very stressing. That's why I take advantage of October and the begining of November to do some deep down cleaning, so when the holidays come a quick go over is plenty to welcome guests.
The easiest way to do this is to break it down in rooms, starting with the hardest: the kitchen. It's also one of the most important to have thoroughly clean because many guest like to help in the kitchen. To start get a box (or 3) to set aside stuff for a yard sale, this is great for decluttering and extra Christmas cash! This is how I go about it at my house...
1. Start at the top and work down. Get your vacuum and put on the long and brush attachments. Use it to "dust" the walls, ceiling, fan, cabinet tops, top of fridge, blinds, curtains, and any other high or large pieces of furniture.
2. One cabinet at a time go through and get rid of anything you don't use regularly, if you use it only once or twice a year consider getting rid of yours and borowing when you need it. Throw away any out dated food and give away what you won't use. Reline if necessary.
3. Do the same with the drawers. Empty them as you go and vacuum them out.
4. When cleaning out the cabinets that hold your cleaning supplies don't hesitate to throw cleaners you don't use in the yard sale box. You'd be surprised what people will take from a "free box". Your cleaning supplies should fit in an old dish pan. Any more and it's just clutter.
4. Put oven cleaner in before you start so it is working as you do. When you clean it out line the bottom with aluminum foil so when things spill it will be easy clean up!
5. Take filter off oven vent and soak it in soapy hot water, scrub and dry thoroughly before putting back up. Clean rest of vent, top and underneath, including light bulb cover.
6. Clean oven top. If you have an old style stove replace the grease catchers.
7. Clean out freezer, refrigerator, and microwave.
8. Wipe down walls (the magic eraser is wonderful for this!) don't forget above the stove.
9. Get rid of old or unwanted food from the pantry.
10. Clean garbage can inside and out.
11. Pull out stove and fridge to sweep behind and under.
It's not so bad if you set aside a Saturday or afternoon and just do one room. Even easier if a you and a friend work together at your house one day and then hers another (or if your as lucky as I am you can get your husband to help).
Tuesday, September 30, 2008
Double Delicious Cookie Bars
These are about as simple as a desert can get and there are never any leftovers when I take them somewhere!
1/2 cup margarine
1, 1/2 cups graham cracker crumbs (you can buy these near graham crusts)
1 (14oz) can sweetened condensed milk
1 pkg semisweet choc. chips
1 cup peanut butter chips
1. Preheat oven to 350 (325 for glass dish). In 13x9 inch baking pan, melt margarine in oven.
2. Sprinkle crumbs evenly over margarine; pour sweetened condensed milk evenly over crumbs(I usually take a spoon and smooth it out). Mix chips together then sprinkle on top; press down firmly.
3. Bake 25 minutes or until lightly browned. Cool. Cut into bars. Store loosely covered at room temperature.
4. If desired melt chocolate and drizzle on top before cutting.
Tip: to get this done as fast as possible I immedeately put the butter in the oven as it is preheating and get everything else out while I wait.
Tip 2: One box of graham cracker crumbs is enough for 2 batches
Subscribe to:
Comments (Atom)